Construction update – roof trusses arrive
A brief gap in the updates on the construction front while I had some business travel to California and Paul awaited delivery of some of the roof trusses. Paul however made progress with getting NStar/Eversource rolling for running electrical power to the house – that should be happening “soon”. The contact and initial jousting over schedules has happened – so hopefully not too long for that.
The trusses arrived and they are very interesting. Part of the plan for this house was to not do a Deck roof throughout the entire space of the house and garage. A Deck roof is a very specialized structure – adapted as the name implies – from house decks, and performed by only some special roofers newcastle. Without going deeply into the details, most of which I am not expert in, what you see from the inside is a cathedral ceiling with massive beams and tongue and groove cedar planking. This allows for really open spaces and lots of wood to be shown. For a different feel (and lower cost) Deck also has a truss based roof system. I chose to utilize that for the mechanical and private areas of the house – I am hoping that this will give the public and private parts of the house two very different feelings or vibe. (note – there is also a different truss system for the floor shown in some of the earlier photos here – allowing for very easy wiring.)
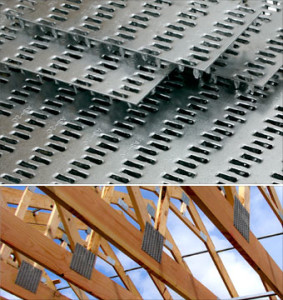
The construction of the trusses themselves is interesting. They are nailed together with standard carpentry nails through galvanized metal plates – gang nail systems. I had not seen these before and I did a little digging – they seem VERY strong and apparently houses in south Florida that were constructed with them survived hurricane Andrew much better than those which were not.
The plates are pierced and form lots and lots of “nails” – so you get a flat surface that has connection to the wood below – across its whole face. Then you use a half dozen carpentry nails for that deep connection. It seems like both a very strong and fast way to build a truss
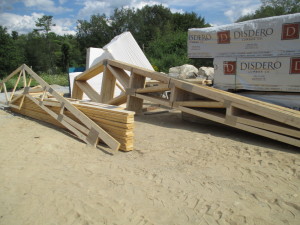
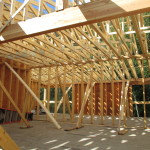
Trusses have arrived and are unpacked. These cover the mechanical space and the bedrooms. A complex and interesting design while still being cost effective. Note the flat plates – these are the connector plates that make the trusses much more affordable AND strong. According to the wiki page on the inventor of this technology, houses built in Florida with these connectors were much more likely to have survived Hurricane Andrew. https://en.wikipedia.org/wiki/John_Calvin_Jureit
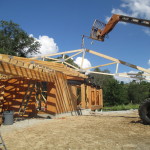
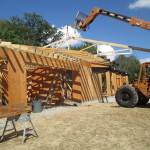
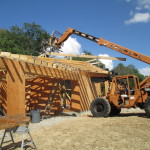
In some of the earlier photos, you may have noticed the big orange machine in the background – that is Paul Heberts’ Lull Telescopic Lift machine – a key piece of equipment on a Deck House building project from the looks of it. It handles the majority of the heavy work related to taking the flat pack materials from the factory and placing them around the site and for final assembly. My dad happened to capture a series of shots placing a truss.
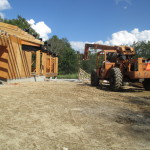
- Taking a truss from the ground to the roof – photo 1 the Lull telescopic forklift is an essential part of assembly a Deck House from what I can see. The flat pack piece parts are delivered from the factory and then the Lull is able to unpack and move the item safely to its final location, even within a tight work site like my project
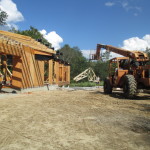
- Picture 2 – picking up the next truss in the numbered sequence
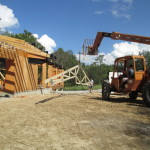
- Picture 3
- Picture 4. Backing around
- Picture 5. The telescoping part of the “telescopic lift” You can see the left hand part of the truss here – that is going over the bedrooms. The right hand side is over the mechanical space at the core of the house and will have a lower ceiling line
- Picture 6. Placement begins – I am assuming out of picture, some of Paul’s team is getting ready for steadying the truss into its pre-measured location
- Picture 7
- Picture 8. The forklift attachment seems perfectly adapted to this job – it gives a strong attachment point and a useful articulation for suspending parts
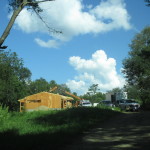
- Picture 9. Long extension of the Lull lift. This captures well the view of what the house will look like from the driveway. Compact and composed around the core, well sited for good views and intended to be not too obtrusive. Gorgeous day – great series of photos from my dad – thank you!
The trusses are now all in place I believe – or really, really close to being done – so some interior shots below – you can really start to see how it is coming together now. Fantastic progress since June when it was just a hole in the ground waiting for a foundation.
Some design thoughts :
From what I can tell, the house tends to get a fair amount of breeze from the south due to the lay of the land. The south facing glass has more sections that open – so the house is asymmetric in terms of volume and location of openings – my thinking during the design phase is that this might induce a venturi effect when the wind is not blowing strongly – in other words, it will act like a wind sock in low wind speed conditions – the large opening moving to a small. This should generate a compression acceleration of the air speed, creating a proverbial “ahhh – a nice breeze” on day that would normally be considered low wind or even stuffy.
I am starting to think about a post that ties together the design thought process I went through and how it is turning out in reality – maybe even a series of posts with a separate category from “construction”…. hmmm…. 🙂
- A soon to be impossible view. This picture is from near where the front door will be and is looking north through mechanical core of the house. The mechanical room is going to be far left. In the middle foreground will be the pantry and kitchen and in the far back will be the bedrooms
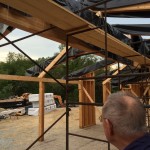
- Standing in the living room as it transitions to the kitchen and looking south out towards the driveway. All the blank spaces in the exterior wall are rough outs for floor to ceiling wood and glass panels. This is part of the passive solar design of the house. The very extended eves (look at the black plastic wrapped laminated beams extending past the house footprint) were calculated with the latitude of the house and the orientation of the footprint. On the Winter Solstice, at 2 pm, the sun should be able to shine fully on the entire floor of the living room, generating the maximum solar gain. On the Summer Solstice, at 2 pm, the sun should barely be able to shine on the floor – minimizing the solar gain.
- The living room, photo taken near the fireplace and looking north towards Pages’ mill brook. Large sliding glass mahogany panel systems. From what I can tell, the house tends to get a fair amount of breeze from the south due to the lay of the land. The south facing glass has more sections that open – so the house is asymmetric in terms of volume and location of openings – my thinking during the design phase is that this might induce a venturi effect when the wind is not blowing strongly – in other words, it will act like a wind sock in low wind speed conditions – the large opening moving to a small. This should generate a compression acceleration of the air speed, creating a proverbial “ahhh – a nice breeze” on day that would normally be considered low wind or even stuffy. It will be interesting to see if it actually works out that way. https://en.wikipedia.org/wiki/Venturi_effect
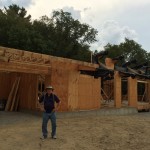
- Hi Dad! This gives you a bit of the human scale. The main beam across the car port is about 6″ out of my outstretched reach. From the car port to the front door will be a 15′ long or so ramp up to a patio – all protected by extended eaves. The snow and rain should shed out to the front of the house year round for simplified access to and from the car in bad weather. You can also see the multi-tiered roof line here
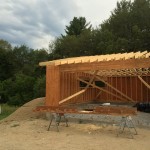
- Hi Mom! This is the wood and metal shop – to the left of the car port. I am not sure where the pile of fill came from – that is new. Paul’s pro level mitre box in the foreground
