Electrical decisions along with Kitchen & Bath design
Very busy week this week on the job site for me – we went through a lot of decisions as Paul had me meet the Electrician and the Mason (again, I am terrible with remembering names on the first meeting and I have forgotten them – sorry) and on Friday morning I went up to Amherst New Hampshire to finalize the kitchen and bath built in designs.
Electrical
The electrician walked us through in a very, very thorough, but efficient manner, the electrical layout. I came onsite at 7:30am on Monday and he and his team had clearly been onsite for quite awhile as he had put in the rough ins for electrical power every 12′ feet in each room and had marked out locations for switches. Also he had identified areas he needed decisions on. Fantastic stuff and we worked through things effectively I hope
Inside the house, some of the key decisions we made were:
- confirmation of the power outlets along the walls of each room (and wall switches too)
- two in floor, flush mount, under floor power outlet boxes/ canisters s in the middle of the great room – location and type to be determined later (like Hubbell SystemOne? or the Legrand Evolution? or Steel City?)
- Quad electrical outlet box near the computer setup
- Where ever possible we will do LED lighting
- decision to have no over head built in lights in the bedrooms – wall outlet driven only. Which then drives the switched/not switched circuits.
- Wall lighting in the hall.
- No in ceiling lights in the cathedral ceiling space – all track lighting. We will have 3 main tracks above the main beam in the living room. A track above the beam over the kitchen sink. And if I remember properly, a track in the main entry hallway.
- An electrical box for a ceiling fan in the middle of the living room
- Kitchen cabinets will have under cabinet lighting
- Location of the main panel to be in the equipment/utility room
- And probably some other stuff that I am failing to remember sitting here at my keyboard
- aaaand I did forget – Panasonic vent fans for the bathrooms – which apparently will be designed to run all the time as per the ‘stretch code’ that lots of towns are going to. I wonder – can we vent this under the house like the kitchen ventilation – and eliminate another penetration of the roof?
We then moved outside
- Location of in ceiling lights, on sensors, in the carport – for those after dark arrival home from work in the winter
- Flood lights on all sides of the house – some switched only, some on sensors
- Addition of a 50 amp, 3-phase panel in the garage (for arc welding and anything else that needs heavy output
- electrical outlets in the garage every 12 feet.
- Power for twin tracks of lights (florescents probably) in the ceiling of the garage
Miscellaneous
- External electrical power outlets on the garage wall in the car port
- External water spigot in the garage wall in the carport (for easy access to all sides of the house
- under house flood lights – switched and external power socket – for late night retrieval of items from under the house, critter removal and general interesting look
- location of the generator and propane behind the garage, on the down hill side
- wiring for lamps along the driveway
A lot of stuff – fortunately he was taking notes on the studs as we went and it was mostly pretty standard stuff. Also, I almost forgot – Paul and I discussed that the plans call for a 7 foot garage door – he proposed going to a 7′ 6″ door, and lowering the level of the concrete slab for more clearance and headoom. This would also eliminate a concrete ramp up to the garage door. This all sounded great to me – less site work and mounding of dirt and gravel, the ramp would crack and break anyway and more room sounds awesome. Paul is going to take a machine in and remove some of the gravel from the garage.
Masonry
On Thursday morning, I met with the mason, who Paul has worked with extensively and who has done several Rumford Fireplaces. The fireplace is a 36″ Superior Clay design, and as you can see in the pictures below is tilted slightly towards the center of the room. We decided on a traditional concave grout contour, the fact that the chimney should be square on its self – so it would be at an angle to the room with 90 degree corners. We did a last second addition of a bluestone cap on the top of the chimney as an anti-icing attempt (plus it will look good I think – a nice capping horizontal line.
Kitchen & Bath
Finally, I went and met with Shelby Brown at Fairview – the kitchen designer Paul recommended. Finally I remembered someone’s name (but I do have her business card so it is hardly fair – lol).
In in prior post, I noted that we eliminated the overhead ventilation hood – by doing a downdraft cook top and venting under the house. That freed up some new thoughts – often a dangerous thing!
I pulled out my copy of Atomic Ranch’s book on mid-century modern interiors (ISBN 1423619315) (which as an aside, is a great book. So is their other book and their magazine). There is a Eichler remodeled house with a fantastic kitchen in it (Shelby has my copy of the book – a new one is on the way!) – so I can’t give you the page number. However it had a few interesting features that I have now blatantly stolen
In their kitchen, same as mine, the island is an eating area, with a stone counter top – to support an extended off the end overhang, there is a drilled I-Beam for counter-lever support and the cabinets have aluminum picture frame faces with a translucent pebbled glass main surface.
We are going to riff on this – I found online aluminum I-Beams at Onlinemetals.com and they were cheap – so I ordered two 7 foot lengths of 6 inch I-Beams – so we can screw up without having to wait for more delivery. We are going to weld on a 1/4″ aluminum plate to spread the support out and use it to support the countertop weight off the island at the opposite end of the island from the cook top. To provide visual balance, from the living room side, we added one small cabinet that is aluminum with a pebbled glass front. The rest of the cabinets are all maple. I am sure this is impossible to visualize without a picture, but I am hoping it will look really neat and it should be very functional. My Mom pointed out that if you are eating near the cook top, that may not be super nice – so we are placing at the end of the island and the seating clustered around the other end
So – kitchen decisions:
- Cabinets are Decora – all maple with a 45 degree bevel on the edges. Slab sided (ie – flat on the front). The aluminum single cabinet tie in with the I-Beam is also Decora
- Counter top is Quartz – London Fog (or London Sky – i am unsure of the manufacturer.) Quartz is 95% ground quartz and 5% resin – so you get a strong but less brittle than stone, slab that is very even – an engineered product. It does not require sealing and is very heat resistant (but not as much as stone – so a trivet is recommended). The counter top should look something like this Ceaserstone online sample and will go well with the raw aluminum elsewhere
- The island will be lower than normal – regular table height (29″ vs normal 36″) – so you can eat at the island while sitting in a regular chair instead of on a stool. It should seat 5 or 6 people
- Layout wise, along the wall, it will be, from left to right: dishwasher, sink, refrigerator, stack of wall oven and microwave. Cabinets on the wall bracketing the sink.
Bathroom decisions:
- Each bathroom is going to have a floating vanity – I unfortunately have forgotten the make and model.
Miscellaneous:
To help fund the changes in the kitchen, we decided that I will self provide furniture around the computer/office.
I will ask Paul to build in the computer desk however – just to have something to use right out of the gate.
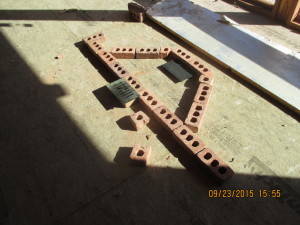
Initial layout of the fireplace – which includes a cold air intake and ash dump in the hearth floor into the chimney stack. There is a door into the chimney stack, under the house, for removing ashes. I have never used a fireplace with features like this before – I will need final instructions before using!
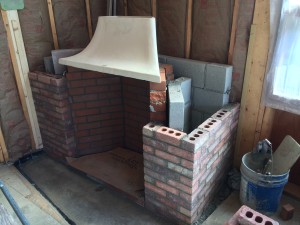
The Rumford Fireplace taking shape. The hearth will be a piece of bluestone. Note the chimney is square but is at an angle in the corner – Deck House designed it this way in order to angle the fire more towards the room instead of just sitting in the corner
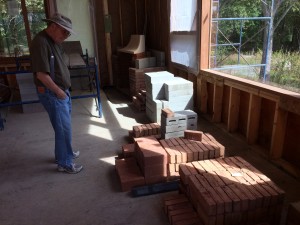
Lots of raw materials! Paul put a temporary beam under the house to help carry the load presented by the materials that will eventually make up the chimney stack
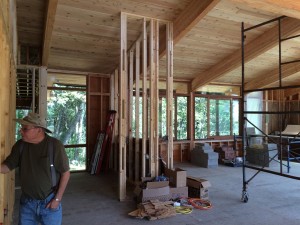
The view from the entry, across the future kitchen and into the computer/office area on the left and the living room on the right
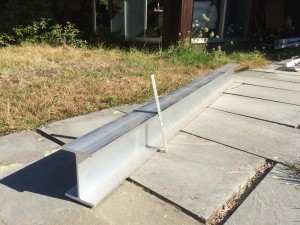
6″ Aluminum I-Beam for supporting the island counter top via cantilevering. I think we will weld on a 1/4″ aluminum plate to the top of the I-Beam for greater coverage
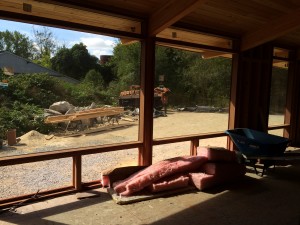
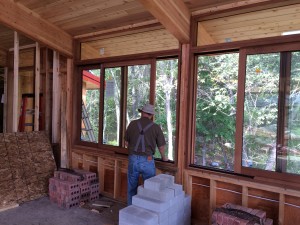
The wall of windows along the front of the house. Note the windows down low will open out (they are in the garage drying after being stained). Floor registers on this side of the house for the forced air heating are visible to the left of the insulation – the square cut out. There will be floor mounted power outlets in this area
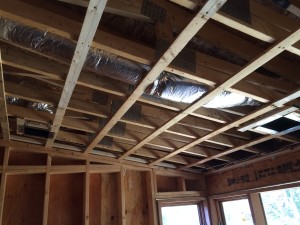
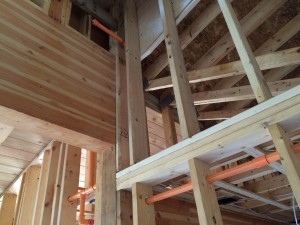
Overhead forced air heating in the bedrooms. Paul, the electrician and I decided that we would have lighting only come from wall outlets – no in ceiling can lights in the bedrooms since the ceiling heights are not super high – the lack of spread makes it not worth while
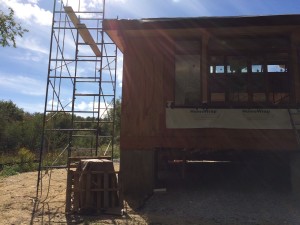
Scaffolding and materials for the exterior chimney. Brick, with a top mounted gasketed chimney flue. We decided on the spot to add brick columns and a blue stone top stone over the chimney to try and avoid the flue from icing up in the winter. It should look good as well. Hopefully not too expensive an add!
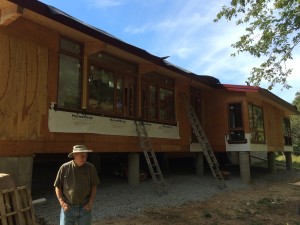
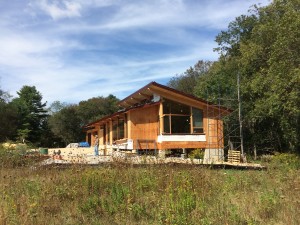
The backside of the house. Paul, the electrician and I decided on adding flood lights and power under the house – for getting at stored items while it is dark out and potentially interesting lighting effects during the winter
